[…] a budget, so I’ve really been working on developing my patience for crafts and DIY projects. This past summer I even painted my first piece of furniture! So, when a sweet friend of mine asked me if I wanted to get together and make Christmas wreaths, I […]

You guys, I cannot believe I’m writing this right now. As creative of a person as I am, I have never been good at crafts or hands-on projects. But, shortly after we bought our house earlier this year, we ran into some majorly expensive plumbing problems and I realized I wasn’t going to have much money to work with for decorating our new home. So, I started to look into how to restore furniture (and, shamelessly, I started to keep my eye out on garbage night for anything I could restore). Restoring furniture ended up working out perfectly for me because I love Shabby Chic home decor, and restoring old furniture is the best way to achieve that look!
But obviously, considering my lack in the craftiness department, I was pretty intimidated.
I honestly had no idea where to start until a friend of mine (who is AMAZING at this kind of stuff) recommended Annie Sloan Chalk Paint to me. After sitting down with her to chat about her experience with it, I decided to give it a shot. And I am SO glad I did!
Here’s a quick run down of what I did to paint my first piece of furniture. (If you’re looking for an in-depth “how-to,” please note that I am not an expert! I can try to answer your questions, but I recommend visiting the Annie Sloan website for tips or to talk to your local Stockist!)
First, I purchased a quart of Annie Sloan Chalk Paint in Old White, a can of Soft Wax and a paint brush.
The next day, I got started on my table, which I had garbage picked from our next door neighbor. As you can see, it’s got a pretty shiny finish to it, as well as a number of scratches and pen scribbles. But the beauty of Annie Sloan paint is that you don’t have to sand your furniture down before painting it! You simply have to wash it.
The Stockist I bought my paint from recommended that I wash my table with Mineral Spirits and then Simple Green. I chose to follow that up with a quick rinse with hot water just to make sure there was no residue left behind from the cleaners.
The table dried pretty quickly after I washed it, so within a few minutes I was able to get started on painting it. I applied two coats of the paint, allowing about an hour for the first coat to dry before starting the second coat. I allowed the paint to fully dry for 24 hours before sanding it down in a few spots to make it look a little rustic (I used a 220-grit sanding sponge from Home Depot). After dusting off any remains from sanding, I applied the Soft Wax, which creates a nice finish and seals and protects the paint. Then, I let it completely dry for another couple of days….
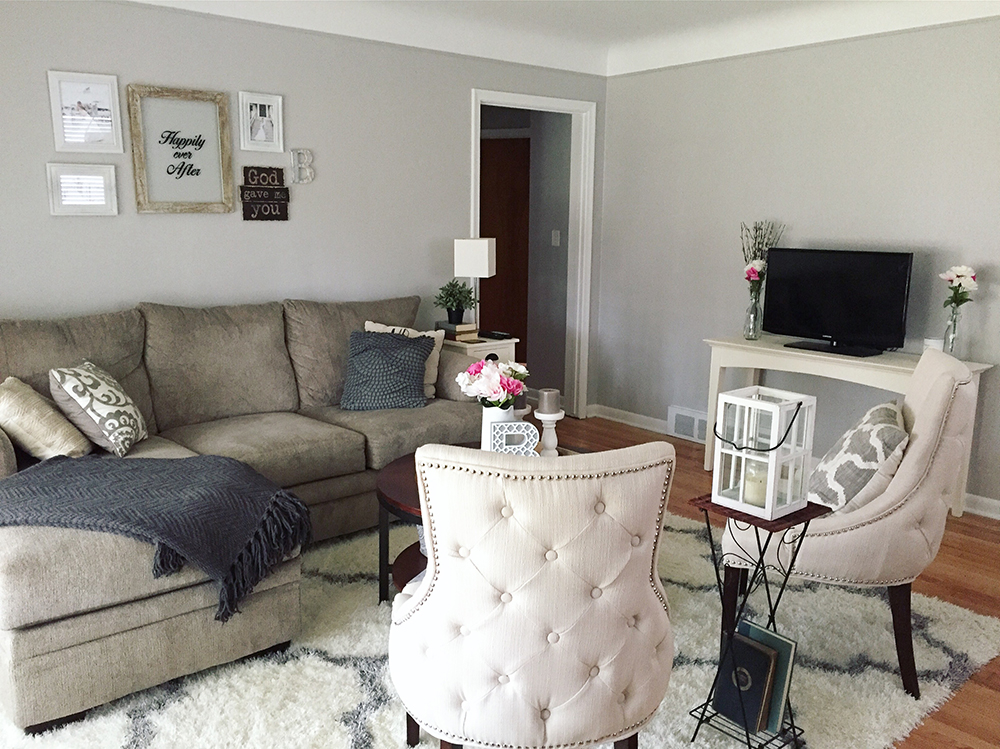
And voila! The table now serves as the new home for our TV!
I was not compensated in any way for this post. This is an honest review of my experience with Annie Sloan paint simply because I wanted to share how simple and easy painting furniture can be! I hope you’ll give it a try.
annie sloan chalk paint diy how to paint furniture how to use annie sloan paint painting furniture


This looks amazing, Jennifer! Love your DIY projects and home decor 🙂